


Keeping the cooling system clean and rust-free on a 1998 Ford Ka (1.0 and 1.3 Endura-E engine) is the cheapest life insurance against a blown head gasket and overheating in traffic. In this real procedure in Paulo's garage — preventive maintenance done every 6 months after a previous heavy flush — you'll see the complete step-by-step to drain from the lower hose, clean the expansion tank tucked behind the shock tower, and bleed the system properly without trapping air pockets.
In addition to the step-by-step, this guide brings the practical takeaways from the video that save time and money: why you should flush the block before washing the engine bay, the trick of using fine gravel with a bottle brush to restore the reservoir's MIN/MAX sight window, using locking pliers on the awkward clamp under the radiator support, and the rule of the bleed pinhole on the Ka's thermostat.
Critical Garage Warnings for Ford Ka Endura Cooling
- 1. Always work with a cold engine and open the reservoir cap before loosening below: Never open the reservoir on a hot engine due to severe burn risk. With the engine cold, removing the top cap first breaks the seal and helps the coolant drain faster through the lower hose.
- 2. Be careful not to crack the radiator's plastic neck: When freeing the lower radiator hose, do not pry aggressively against the plastic neck. Gently lift the rubber lip with a thin flat-blade screwdriver to break it loose without cracking the radiator outlet.
- 3. Flush the system before washing the engine bay: If you hook up a pressurized garden hose to the reservoir to flush the block, backflow can spray water all over the engine bay. Always finish the hydraulic work before doing any cosmetic engine cleaning.
- 4. Test first with 1 liter of water before pouring in the additive: Upon reassembly, pour 1 liter of water first to confirm there is zero dripping underneath before adding the new coolant additive.
Key procedure moments in the video
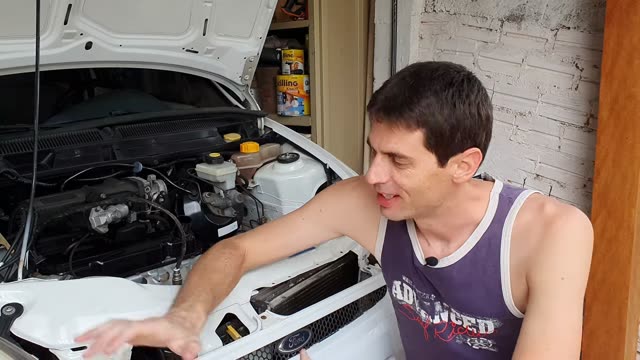 ▶ 00:05 Additive, volume (~6 L), and cap opening
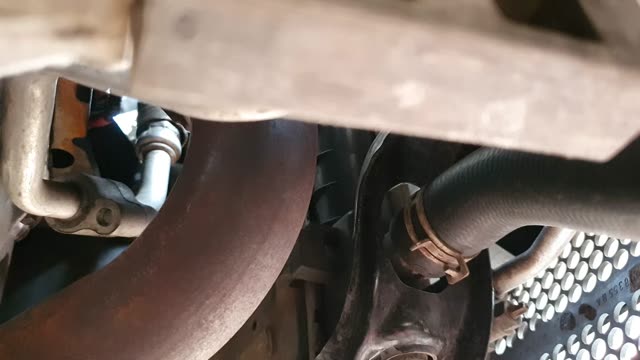 ▶ 02:52 Lower clamp with locking pliers
 ▶ 05:44 Reservoir cleaning with gravel and brush
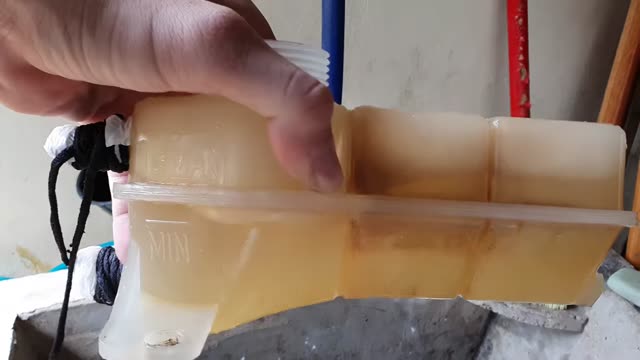 ▶ 11:25 Reservoir rail and 8 mm bolt
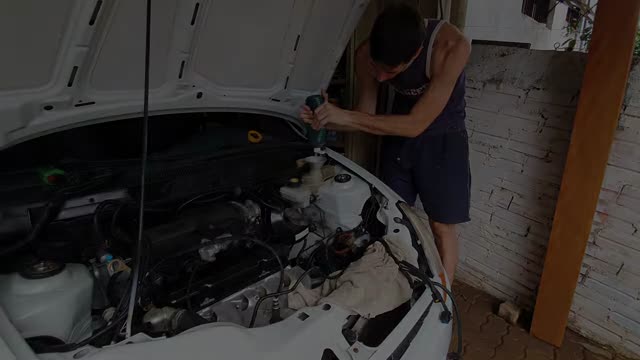 ▶ 14:19 Bleeding (2 min cap off + 2x fan)
Quick Table of Volumes, Tools, and Specs (Ford Ka Endura)
Scroll horizontally to see all table columns.
| Technical Parameter | Official / Real Specification | Practical Garage Note |
|---|---|---|
| Total system capacity (Endura engine) | ~6 liters (completely empty system) | In a simple drain without removing the thermostat, part of the coolant stays in the block and is refreshed by dilution |
| Expansion reservoir mounting | 8 mm bolt on top + side guide rail | Check the fit in the side rail when reinstalling so the tank sits firmly without vibrating |
| Lower hose clamp | Spring-tension clamp under radiator support | Use locking pliers to lock it open and slide it back without slipping |
| Bleeding protocol in the video | Max. 2 min running with cap off → put cap on → 2 cooling fan cycles | The Ka's thermostat has a small bleed hole/jiggle pin that helps air escape upward even before it opens |
| Reference cost for a new reservoir | ~R$ 18 (aftermarket replacement) | If the reservoir is heavily yellowed or cracked, replacing it is often cheaper than spending money on chemicals |
Tools and Supplies Checklist
Scroll horizontally to see all table columns.
| Item / Tool | Specification | Role in Procedure |
|---|---|---|
| Locking Pliers + Thin Flat Screwdriver | Hose handling | Compress the lower spring clamp and pry the hose lip loose without stressing the plastic neck |
| Socket / Combination Wrench | 8 mm | Remove and tighten the upper bolt on the expansion reservoir |
| Very Fine Gravel + Liquid Soap + Bottle Brush | Internal mechanical cleaning | Shake inside the reservoir to dislodge crust and restore MIN/MAX level visibility |
| Radiator Additive + Demineralized Water | ~6 L total (ratio per manufacturer) | Protect against corrosion and raise the boiling point (if using concentrate, follow the dilution ratio; avoid straight tap water on final fill) |
| Neutral Dish Soap (a tiny drop) | Assembly lubrication | Help stiff hoses slide onto necks without tearing the rubber |
Step-by-step — Start: Preparation, Lower Drain, and Reservoir Removal
Choosing the Additive and Opening the Cap on a Cold Engine
Set aside roughly 6 liters total of coolant additive and demineralized water. For long-term continuous use, prefer a good-quality concentrated additive (such as Motorcraft or an organic concentrate diluted to 50%); if you do preventive changes every six months like Paulo does on this Ka, choose a biodegradable additive compatible with the engine block.
With the engine completely cold, loosen the top cap of the expansion reservoir first to equalize atmospheric pressure before opening the line underneath.
▶ at 00:05 in the video ↗Releasing the Lower Radiator Hose with Locking Pliers
Under the front of the Ka, locate the lower radiator hose: the spring clamp sits in a tight spot right beneath the radiator support. With locking pliers, squeeze and lock the clamp tabs open to slide it back along the hose.
To free the stuck rubber without risking cracking the plastic radiator neck, gently slip a thin flat-blade screwdriver under the edge of the hose all the way around, breaking the seal before pulling it off and letting all the old coolant drain out.
▶ at 02:52 in the video ↗Step-by-step — Middle: Reservoir Cleaning (Gravel) and System Flush
Cleaning the Reservoir with Fine Gravel and a Bottle Brush
Remove the upper 8 mm bolt and the small return hoses, slide the reservoir out from beside the shock tower, and take it to the sink. To knock loose deposits inside the internal chambers where a brush cannot reach, add a handful of very fine gravel with liquid soap and water and shake vigorously — then finish with a bottle brush.
The main goal is to get the walls around the MIN and MAX marks translucent enough for easy level reading (and if the tank is already brittle, remember a new aftermarket one costs around R$ 18).
▶ at 05:44 in the video ↗Light Circuit Flush Without Soaking the Engine Bay
If you want to refresh even more of the coolant trapped in the block without removing the thermostat, temporarily reconnect the lower hose, fill with clean water through the upper hose, and drain again at the bottom until it runs clear (attaching a small hose to the return port to route the stream outside the engine bay).
Watch the hose water pressure: do not open the tap full blast into the inlet neck or water will splash onto the spark plugs and engine wiring harness. If there is heavy rust buildup, the proper fix is a deep flush with the thermostat removed.
▶ at 08:33 in the video ↗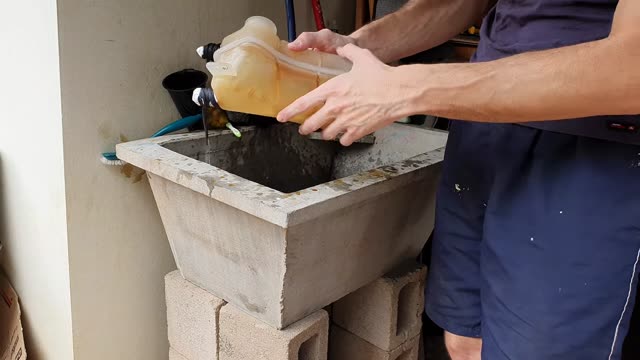
Step-by-step — End: Reassembly, Bleeding (2 Minutes + Fan), and Level Check
Reinstalling the Lower Hose and the Reservoir on Its Rail
Reconnect the lower radiator hose and position the spring clamp back at its original mark using the locking pliers (if the original clamp has lost tension, replace it with a good-quality worm-gear hose clamp). If any upper hose is too tight to slide on, rub a tiny drop of neutral dish soap inside the rubber lip.
Fit the clean reservoir back in place, making sure the side rail slides properly into the body channel so it sits straight and solid before tightening the upper 8 mm bolt.
▶ at 11:25 in the video ↗1-Liter Leak Test, 2 Minutes Cap Off, and 2 Fan Cycles
Pour in 1 liter of demineralized water first and look underneath the car to be completely sure nothing is dripping before adding the coolant additive. Once everything is dry, top up with the additive to the mark and wait a few minutes for air to escape through the Endura thermostat's bleed pinhole.
Video bleeding sequence: reconnect the battery, run the engine for at most 2 minutes without the cap on the reservoir (watching and topping up if the level drops), shut it off, put the cap on, start it again, and let it warm up until the cooling fan cycles on twice.
▶ at 14:19 in the video ↗Overnight Cooldown and Final Cold Level Adjustment
After the second fan cycle, shut off the engine and let the car cool down completely (preferably overnight, or with the cap left open at night once cold so the last trace of air can escape). The next morning, set the level right between the MIN and MAX marks on the clean reservoir and close the cap firmly.
▶ at 16:00 in the video ↗
Post-Service Inspection Checklist
- Lower hose dry: Zero dripping at the lower radiator connection after both cooling fan cycles.
- Cooling fan cycling normally: A sign that there is no air pocket trapped in the thermostat housing or around the fan switch/sensor.
- Stable cold level: Colored coolant visible between MIN and MAX without dropping over the following days.
Frequently Asked Questions (FAQ)
How many liters of coolant does the Ford Ka Endura hold?
Total system capacity is around 6 liters. In a simple drain through the lower radiator hose, some old fluid remains in the block and mixes with the new coolant — which is why regular preventive changes keep the system consistently clean.
How do you remove mud from the Ford Ka coolant reservoir without damaging it?
Remove the reservoir from the car (8 mm bolt), add a little very fine gravel with liquid soap and water, and shake well to break up crust inside the internal chambers; then scrub with a bottle brush. Remember to rinse thoroughly so not a single pebble remains inside.
Why can't I leave the engine running for long without the reservoir cap?
Because the Ford Ka cooling system operates under pressure held by the cap. Without pressure, as the coolant heats up near 95–100 °C, it boils and overflows out of the neck. That's why in the video the engine runs uncapped for at most 2 minutes while still cold/warm, and warming it up to trigger the fan is done with the system closed.