


Just like manual transmission oil, the owner's manual usually treats the power steering fluid of the VW Gol G3 / Power (2000 to 2005) as a "top up only if needed" item. In practice, after years of thermal cycles and contamination from pump and steering rack wear, the fluid turns dark, smells like burnt oil, and builds up black sludge on the reservoir's internal filter screen — straining the hydraulic pump and causing noise or heavy steering.
In this complete technical guide based on Paulo's real procedure on a 2003 Gol Power, you will learn how to perform a surgical cleaning of the disassembled reservoir (including the internal screen and spring washed with diesel fuel), make an honest fluid choice (VW G004000M2 / Pentosin vs. ATF Lubrax), and use the safe method of active flushing through the return hose without ever letting the pump draw air.
Critical Garage Warnings for VW Gol G3 Power Steering
- 1. Never let the makeshift reservoir run dry during the active flush: The power steering pump has a very high flow rate as soon as the engine turns over. If the level drops enough to draw air on the suction side, the pump runs dry and fills the circuit with microbubbles.
- 2. Be careful when disassembling the old reservoir: The lower plastic nipple endures years of under-hood heat and becomes brittle. Twist the hose off gently without stressing the nipple, press the two lower bracket clips to pull the cup out, and only try to unscrew the upper black cap with it clamped in a bench vise (never on the car).
- 3. Do not use WD-40 or solvent on internal assembly: To lubricate the cap threads and the internal reservoir ring before closing, use a few drops of the new fluid itself so you don't contaminate the hydraulic oil.
- 4. Buy more than 1 liter (use 2 bottles of 1 L): The system takes a little over 1 liter when combining the return-line flush and the final syringe refill.
Key procedure moments in the video
 ▶ 00:10 Fluid choice (VW G004 vs. ATF) and syringe
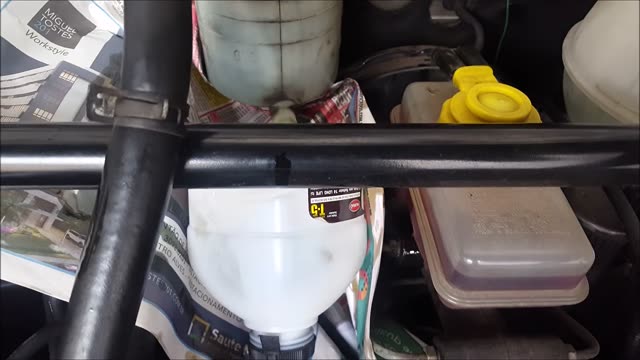 ▶ 06:20 Bench vise disassembly and sludge-clogged screen
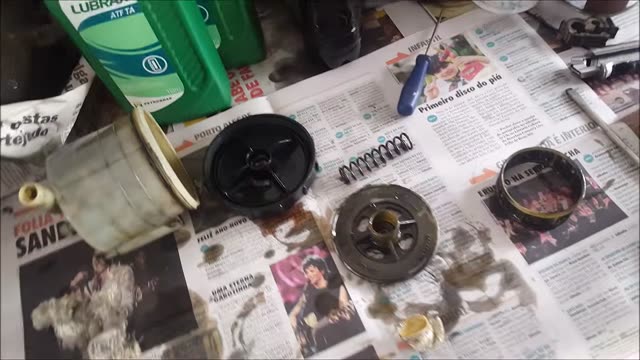 ▶ 09:20 Diesel wash + clean reassembly
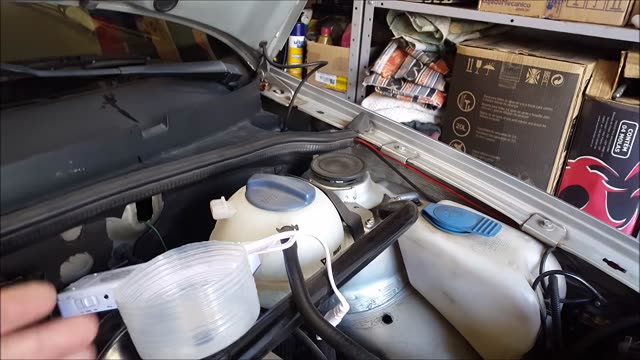 ▶ 12:20 Active flush via the return hose
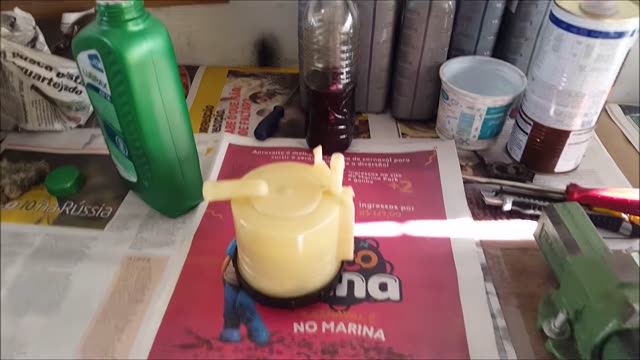 ▶ 19:10 Steering bleeding and final syringe exchange
Quick Reference Table: Fluids, Tools, and Specs (Gol G3 Power)
Scroll horizontally to see all table columns.
| Technical Parameter | Official / Real Specification | Practical Garage Note |
|---|---|---|
| Original VW-specified fluid | VW G004000M2 (or equivalent Pentosin) | Costs around R$ 120 to R$ 150/liter; VW-specific green mineral/synthetic fluid |
| Alternative used in the video | ATF Lubrax (automatic transmission / power steering fluid) | Also used by local specialist shops; allows regular changes at a much lower cost (never mix — perform a complete flush) |
| Required volume | 2 bottles of 1 liter (uses slightly over 1 L) | Provides enough margin to push old fluid out through the return line and do a second clean cup exchange with a syringe |
| Reservoir hoses | Suction (thicker/reinforced) · Return (rear/thinner) | Suction feeds directly into the hydraulic pump; return brings oil back from the steering rack to the reservoir |
| Fuel pump fuse (test) | Fuse No. 14 in the fuse box | Tested in the video to crank on the starter only; since cranking flow was low, flushing was done by briefly starting and shutting off the engine |
Tools and Supplies Checklist
Scroll horizontally to see all table columns.
| Item / Tool | Specification | Role in the Procedure |
|---|---|---|
| Large Syringe + Silicone Tubing | 60 ml syringe | Drain old fluid from the reservoir before disconnecting hoses and perform the final top-up exchange after bleeding |
| Bench Vise | Firm grip without crushing the plastic | Hold the reservoir body to safely unscrew the upper black threaded cap |
| Diesel Fuel + Neutral Detergent + Brush | Chemical cleaning | Remove heavy black sludge from the filter screen and spring (where water and detergent alone fall short) |
| Funnel / Makeshift Reservoir + Clear Bottle | Fitted to the suction and return hoses | Feed the pump with fresh fluid while the bottle collects old oil until it runs clean |
| Clamp Pliers / Flathead Screwdriver | Mechanical support | Release clamps on the suction and return hoses and press the lower bracket retaining tabs |
Step by step — Start: Draining, Removal, and Reservoir Disassembly
Initial Suction with 60 ml Syringe and Hose Identification
With the car cold and switched off, line the area under the reservoir with newspaper or a rag and use the 60 ml syringe with silicone tubing to extract as much dark fluid as possible from inside the cup.
Before loosening any clamp, identify both hoses: the suction hose (thicker and reinforced, dropping straight down to the pump) and the return hose (at the rear, thinner, bringing oil back from the steering rack). Work both off gently by twisting without forcing the dry, brittle plastic nipples.
▶ at 03:00 in video ↗
Releasing the Lower Clips and Opening the Threaded Cap in a Vise
To remove the reservoir from the metal bracket in the engine bay, press the two lower plastic clips simultaneously and pull the cup upward.
On the workbench, you will see that the upper black cap of the cup is threaded and extremely tight to loosen. Clamp the reservoir body in the bench vise (without crushing it) and unscrew the black cap. Once open, the surprise: inside, the filter/strainer and spring were coated in thick black sludge — proving why changing the fluid makes all the difference.
▶ at 06:20 in video ↗Heavy-Duty Cleaning with Diesel Fuel, Detergent, and Drying
Water and detergent alone will not remove the oily sludge caked onto the filter screen or the spring (which looked clean, yet was black until brushed back to its original metallic gray). Wash the cup, strainer, spring, and internal plate first with diesel fuel and a brush.
Once all the sludge has dissolved, wash everything with water and neutral detergent, rinse thoroughly, and dry completely in the sun or with compressed air before reassembly.
▶ at 09:20 in video ↗Step by step — Middle: Active Return-Line Flush and Cup Reassembly
Setting Up the Temporary Flush Circuit (Suction vs. Return)
With the reservoir still out of the car, fit a tall funnel or makeshift reservoir onto the end of the suction hose (filled with fresh fluid) and connect a clear hose extension to the return hose routed into an empty bottle visible through the windshield.
Real lesson from the video: Paulo initially pulled fuel pump fuse No. 14 to try cranking on the starter alone, but starter flow was weak. After reinstalling the fuse and doing quick starts (starting and shutting off the engine immediately within 1–2 seconds), the hydraulic pump pushed out the old fluid at full force until clean red fluid came out into the bottle — always keeping the suction funnel topped up so it never draws air!
▶ at 12:20 in video ↗Reassembling the Strainer, Spring, and Cap Lubricated with ATF
On the workbench, seat the clean strainer at the bottom of the reservoir, place the plastic support piece over the strainer, insert the spring, and close with the black threaded cap. Before tightening the cap, apply a drop of fresh ATF fluid itself to the threads and the spring seating rim so it glides smoothly without plastic galling against plastic (never use WD-40).
Reinstall the reservoir into the engine-bay bracket until it locks, firmly reconnect the suction and return hoses with their clamps, and fill the cup up to the maximum level mark.
▶ at 15:50 in video ↗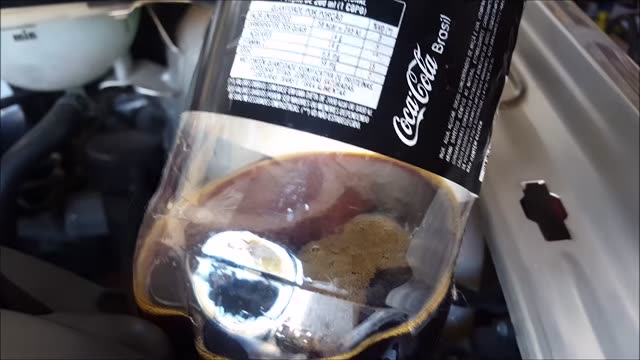
Step by step — End: Steering Bleeding and Final Syringe Refresh
Lock-to-Lock Bleeding (5x) and Second Reservoir Exchange
Start the engine while watching the level in the cup (if it drops fast, shut it off immediately and top up). Once the level stabilizes, turn the steering wheel slowly from lock to lock about 5 times to each side to purge any air bubbles trapped in the steering rack.
Finishing trick from the video: when turning full lock, residual old fluid trapped in the rack chambers mixed slightly and darkened the oil in the cup. With the 60 ml syringe still handy, Paulo drained the cup once more and refilled it with fresh fluid — leaving the red liquid crystal clear at the exact level.
▶ at 19:10 in video ↗Final Check of Level, Cap, and Hose Clamps
Close the reservoir's upper cap, wipe away old drips beneath the steering rack, and check for any seepage at the suction and return connections. Over the next few days, if the fluid still darkens slightly from residual traces, simply repeat a quick syringe extraction in the cup and top up.
▶ at 21:40 in video ↗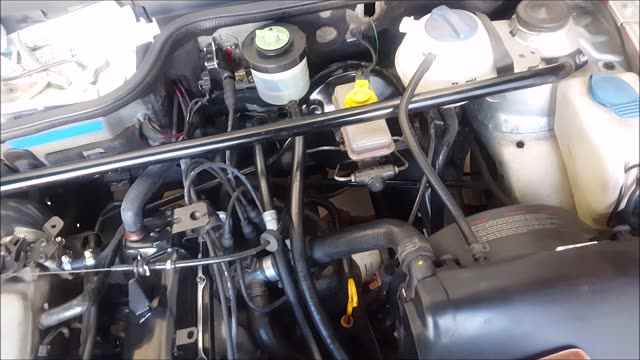
Post-Service Inspection Checklist
- Quiet steering at full lock: No whining or pump cavitation when turning the steering wheel all the way to the stops.
- Stable cold/warm level: Clean, translucent fluid visible within the proper range of the cleaned reservoir.
- Dry hose clamps: Zero leaks at the lower plastic nipples of the reservoir (if oil sweats months later, recheck clamp tightness).
Frequently Asked Questions (FAQ)
Which fluid should I use in the Gol G3 power steering: VW G004000M2 or ATF?
VW's factory specification for the Gol G3 is VW G004000M2 (or equivalent Pentosin CHF, ~R$ 120–150/L). In the video, Paulo chose to perform a full flush with ATF Lubrax (the same fluid adopted by local specialist workshops), noting that you must never mix the two types without draining the old fluid first.
Why is it so important to open and clean the inside of the reservoir?
Because inside the reservoir there is a fine filter screen and a retaining spring that accumulate thick black sludge over the years. Simply swapping the oil without cleaning this strainer keeps flow restricted and immediately contaminates the fresh fluid.
How many liters of fluid do I need to buy for a complete change?
Buy 2 bottles of 1 liter. The full procedure (pushing old oil out through the return line plus a second cup refresh with a syringe) uses slightly more than 1 liter.