


The continuously variable transmission (CVT) of 1st generation fitted to the Honda Fit 2004 (1.4-liter 8-valve engine, GD1 chassis) is admired for smooth gearing and fuel economy, but has a critical vulnerability known to owners and mechanics: severe takeoff shudder and launch judder (phenomenon known internationally as "start clutch judder"). When fluid loses friction modifiers and shear stability, the internal wet start clutch (start clutch) slips erratically upon lockup, making the entire car feel like it is shaking apart when starting up hills or pulling away from traffic lights.
Many owners spend fortunes replacing motor mounts unnecessarily or get excessive quotes to rebuild the transmission. However, in more than 90% of cases, the problem is 100% cured by a partial gravity transmission fluid drain and refill using strictly genuine Honda CVTF (or HCF-2). In this hands-on workshop guide recorded in the garage shop, Paulo shows the complete home procedure, explaining splash shield removal, the proper square tool, magnetic plug cleaning, and the secret of hot fluid level checking.
Critical Safety and Specification Warning
NEVER use conventional ATF fluid (Dexron, Mercon, or power steering fluid) in the Honda Fit CVT transmission: CVT transmissions operate under extreme hydrostatic pressure across conical pulleys and steel push-belts, demanding a unique dynamic friction coefficient. Incompatible fluids burn out the start clutch and destroy the belt within miles. Use only genuine Honda CVTF fluid (CVTF 05 / HCF-2 specification) purchased at authorized dealerships or certified suppliers.
Burn hazard: To ensure fluid drains quickly carrying suspended particles, perform procedure with engine warm. Use reinforced nitrile gloves when loosening drain plug to avoid contact with hot fluid.
Tools and Accessories Table
Scroll horizontally to see all table columns.
| Tool / Equipment | Size / Specification | Role in Procedure |
|---|---|---|
| Open-End / Hexagonal Socket | 17 mm | Removal and torque tightening of the 4 splash shield anchor bolts beneath engine |
| Ratchet / Male Square Drive | 3/8" (9,5 mm) | Direct engagement into female square recess on CVT transmission drain plug |
| Click-Type Torque Wrench | Scale 20 to 100 N·m | Accurate torque tightening of transmission drain plug to official 49 N·m |
| Clean Plastic Funnel with Narrow Spout | Long narrow neck Ø 10 mm | Direct coupling into yellow dipstick guide tube inside engine bay |
| Oil Catch Basin | Minimum capacity 4,5 liters | Clean collection pan for metallic debris check and volume measurement |
| Clean Shop Rags and Degreaser Spray | Lint-free | Thorough cleaning around drain plug before opening to avoid contamination |
Fluids and Replacement Parts List
Scroll horizontally to see all table columns.
| Item / Component | Technical Specification | Quantity | Workshop Guidance |
|---|---|---|---|
| Genuine CVT Transmission Fluid | Honda Genuine CVTF (or HCF-2) | 3,2 Liters (purchase 4 bottles of 1L) | Gravity drain capacity: ~3,2 liters. Sealed genuine bottles from Honda dealer. |
| Drain Plug Crush Washer | Aluminum inner Ø 18 mm | 1 unit | Preventive replacement recommended by service manual for 100% leak-free seal. |
| Dipstick Sealing O-Ring | Yellow rubber O-ring | 1 unit (if degraded) | Ensures airtight seal against dust and water into upper fill tube. |
Recommended Torque Specifications Table
Scroll horizontally to see all table columns.
| Fastener / Component | Tool Used | Official Torque Spec | Practical Workshop Advice |
|---|---|---|---|
| CVT Drain Plug | Square drive 3/8" | 49 N·m (5,0 kgf·m) | Steel thread into aluminum casing. Always torque carefully to seat washer cleanly. |
| Splash Shield Mounting Bolts | 17 mm | 35 to 40 N·m (3,5 to 4,0 kgf·m) | Snug crisscross tightening across all 4 subframe mounting holes to prevent rattles. |
Step-by-Step Procedure: Honda Fit CVT Fluid Replacement
At the start of the video, Paulo introduces his 2004 Honda Fit 1.4 and details the classic shudder: upon takeoff on hills or at traffic lights, the transmission bucked violently. Having tried calibration procedures without success, the technical fix was fresh genuine Honda CVTF fluid, resolving the issue permanently.

With vehicle securely leveled on jack stands, Paulo inspects transmission underside. The CVT drain plug is located on the lower left face of the transmission casing, partially shielded by the skid pan.
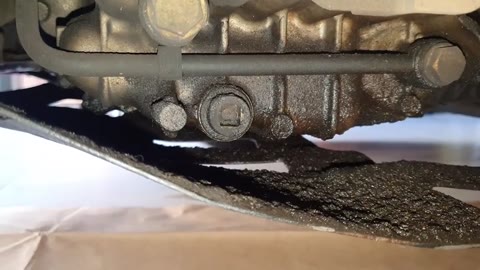
To avoid messy oil pooling on the splash shield and ensure clear line of sight, Paulo removes the 4 bolts with 17 mm heads. Removing shield provides ample clearance to position the catch basin ergonomically.
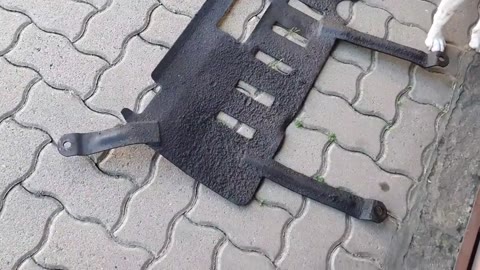
Before cracking bolts, spray degreaser and wipe away grit around plug with clean rag. Any dirt entering the CVT can damage sensitive valve body hydraulic spools. Position 4,5-liter drain basin underneath.
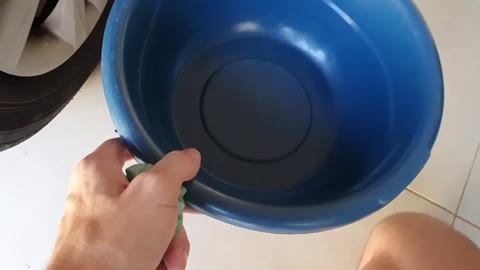
Honda CVT drain plugs have no external hex head; they use a female square recess of 3/8" (9,5 mm). Seat the square drive of a 3/8" ratchet (or 1/2" to 3/8" adapter) fully into recess before turning counter-clockwise.

Paulo's clever tip: leave the yellow dipstick in its guide tube during initial plug removal. Partial vacuum inside prevents fluid from gushing violently, allowing clean removal by hand.
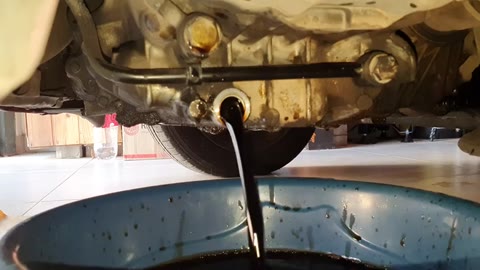
The OEM drain plug has an integrated neodymium magnet. Paulo inspects the tip: only a fine gray silt of normal clutch wear is present, without chipped teeth or roller fragments, confirming sound condition of belt and pulleys.
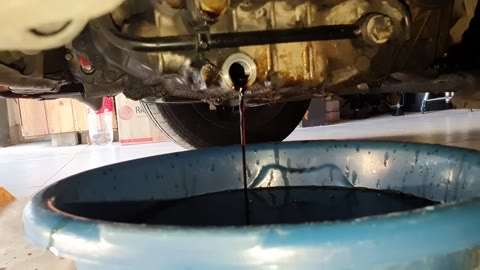
Withdraw yellow dipstick from engine bay to admit air and allow about 10 minutes for all 3,2 liters to drain completely. Clean plug threads and magnet with degreaser until bare steel shines. Fit fresh aluminum crush washer.
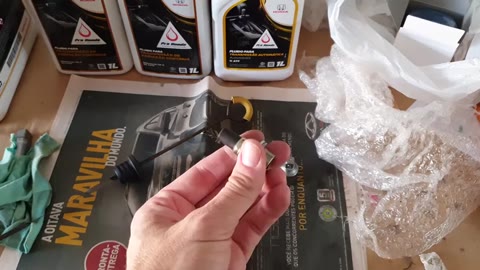
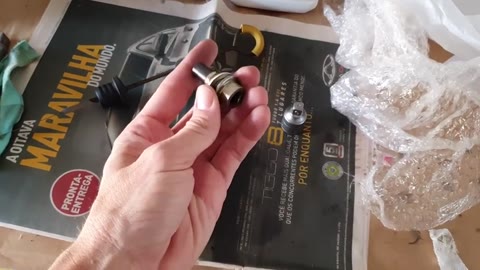
Thread plug by hand until flush. Set torque wrench to 49 N·m (5,0 kgf·m / 5 kg spec in service manual) and tighten smoothly until click. Reinstall splash shield with 4 bolts 17 mm.
In engine bay, place a clean narrow-neck funnel into the dipstick tube. Slowly pour in 3 bottles (3,0 liters) of genuine Honda CVTF fluid. Pour gradually so displaced air vents smoothly.

Insert dipstick to verify cold level sits between COLD marks. Start engine, hold footbrake, and cycle shifter through all positions (P, R, N, D, S, L) pausing briefly in each. Let engine idle until cooling fan cycles twice. Shut off engine and check dipstick between 60 and 90 seconds after shutdown: fluid level must sit dead-center in HOT zone. Road test: takeoff shudder 100% cured!
Pro Tips and Secrets of Honda CVT Transmissions
The 60 to 90 Second Rule for Checking Fluid Level
Unlike GM or Ford vehicles where transmission fluid is checked with engine idling in park, on Honda vehicles CVT level MUST be measured strictly with engine OFF, between 60 and 90 seconds after shutting down at operating temperature. Checking with engine running or after cooling down causes severe reading error.
Preventive Fluid Changes Every 40.000 km
The Honda Fit service manual prescribes CVT fluid changes every 40.000 km (or 20.000 km in severe urban use). Respecting this interval guarantees the CVT transmission will surpass 300.000 km without shudder or metallic belt wear.
Frequently Asked Questions (FAQ)
Why does the Honda Fit shudder when taking off on hills?
The 1st generation Fit CVT (2003 to 2008) does not use a conventional hydraulic torque converter; it employs a wet multi-plate start clutch bathed in the transmission oil. When fluid ages and loses friction modifiers, clutch plates grab and slip erratically upon lockup, generating the characteristic shudder that disappears once fresh fluid is introduced.
Can I use aftermarket multi-vehicle CVT fluid (Motul, Valvoline, Febi)?
While universal multi-vehicle fluids with Honda approval exist, community workshop experience proves that genuine Honda CVTF fluid is the only one delivering 100% immediate judder elimination. The slight price difference per liter is not worth the risk of persistent symptoms.
How many liters of oil drain during a partial gravity change?
In a standard gravity drain removing only the bottom drain plug, exactly between 3,0 and 3,2 liters of oil drain out (total dry capacity of an empty transmission is 5,4 liters, with roughly 2 liters remaining in internal oil passages and valve body).